Chuyển đổi dữ liệu
Tạo SageMaker Notebook
Bạn thực hiện tạo SageMaker Notebook bằng 2 cách (chọn 1 trong 2):
-
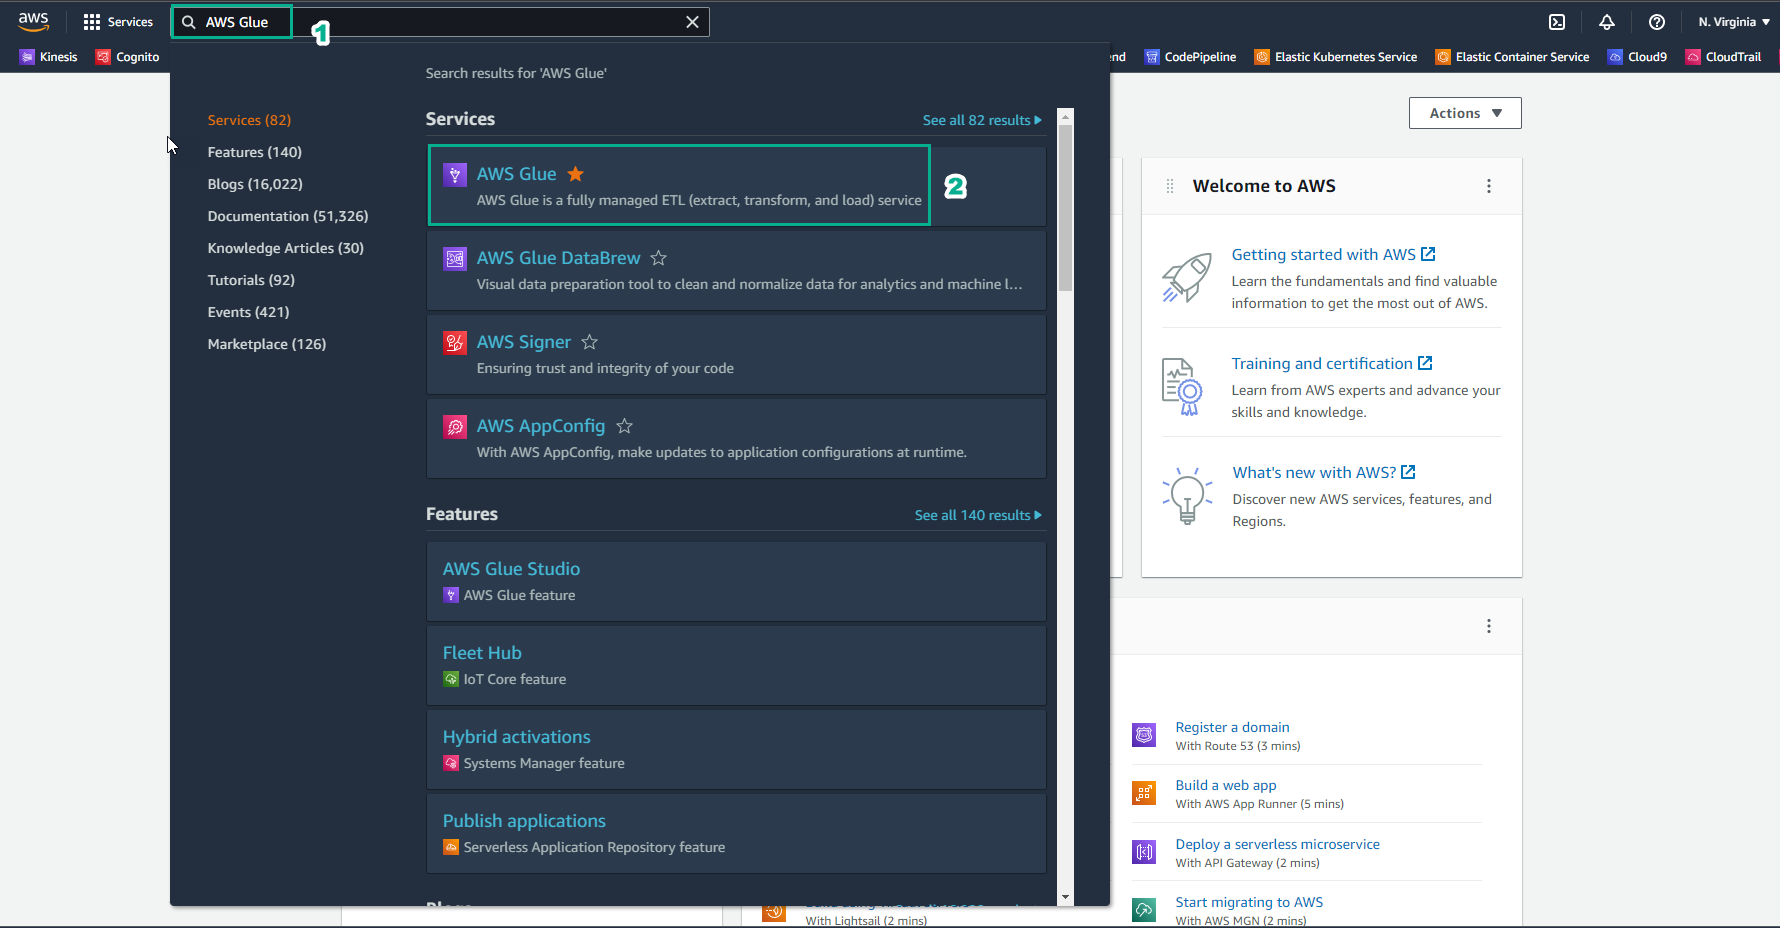
Truy cập AWS Management Console
- Tìm AWS Glue
- Chọn AWS Glue
-
Chọn Notebooks
-
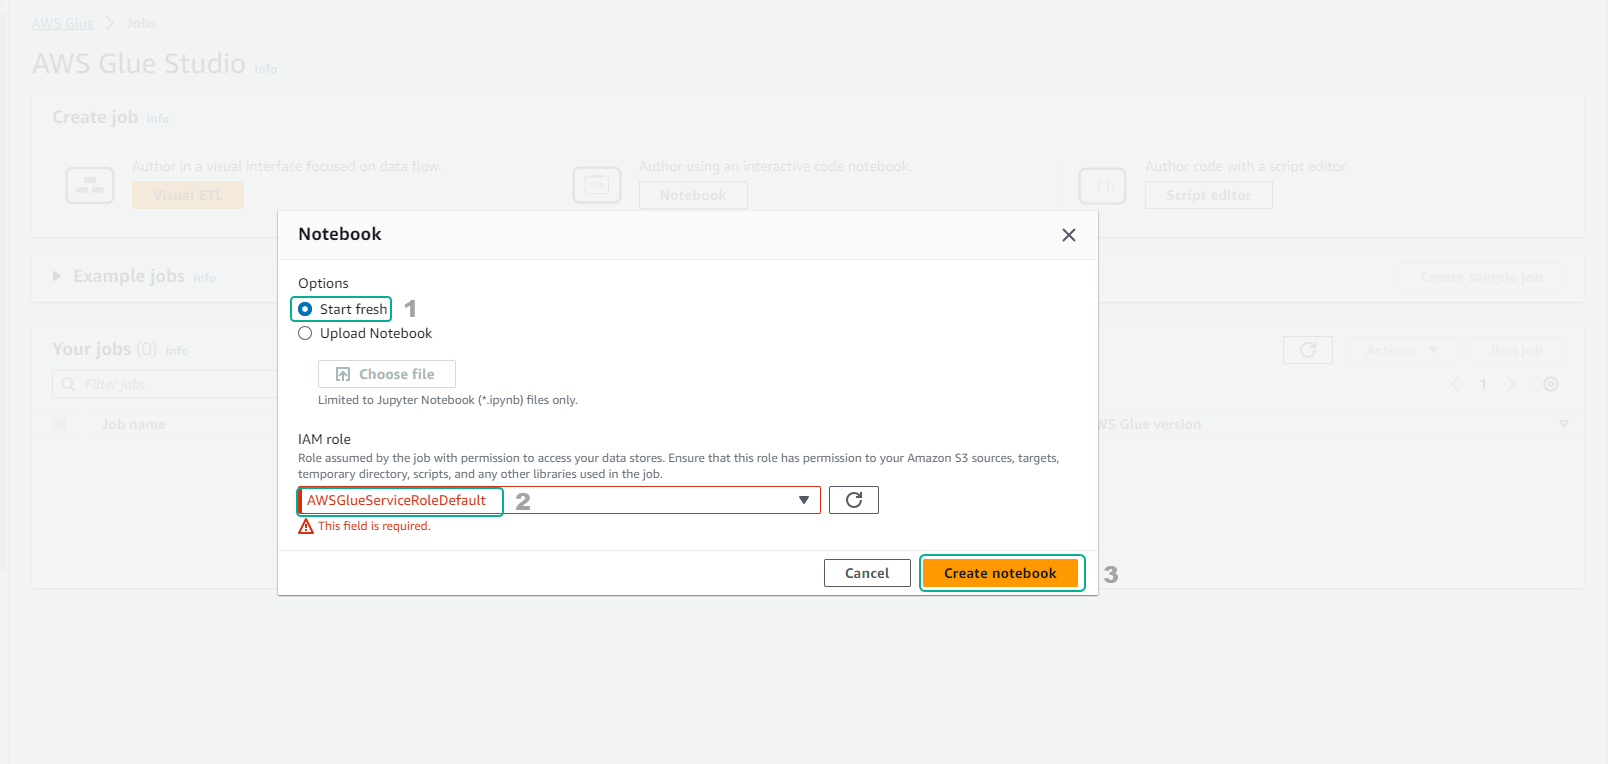
Nhập tên notebook là
notebook- Chọn IAM role
- Chọn Start notebook
-
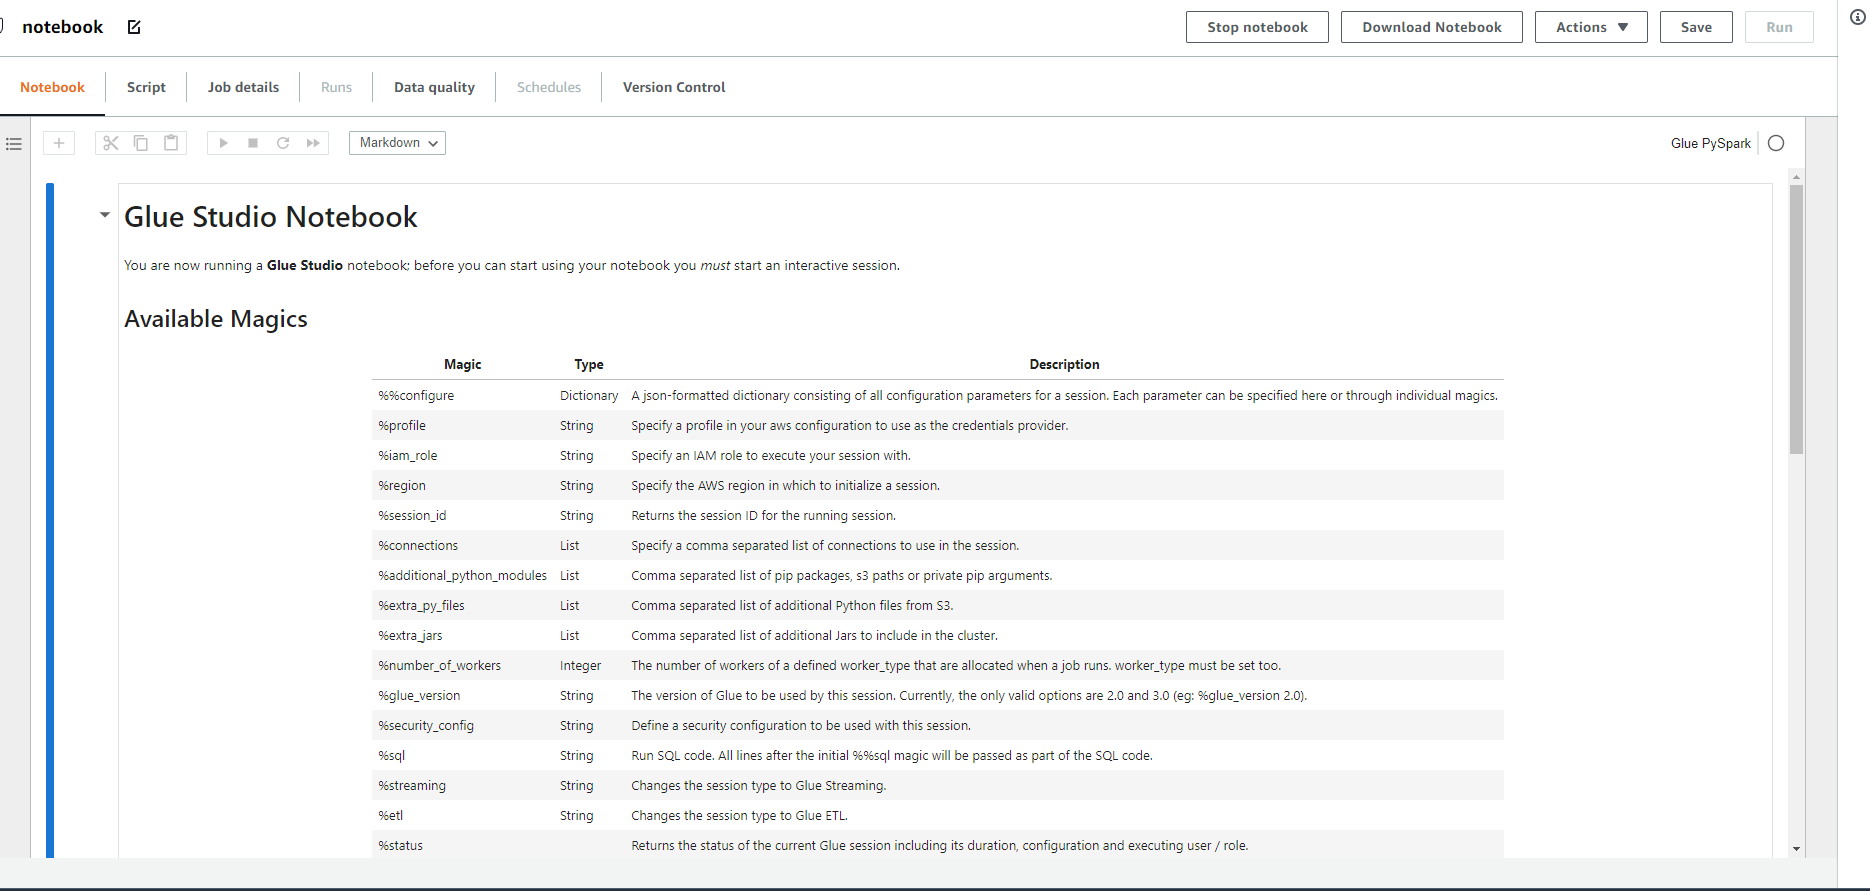
Đợi dao động khoảng 2-3 phút sẽ hoàn thành notebook.
-
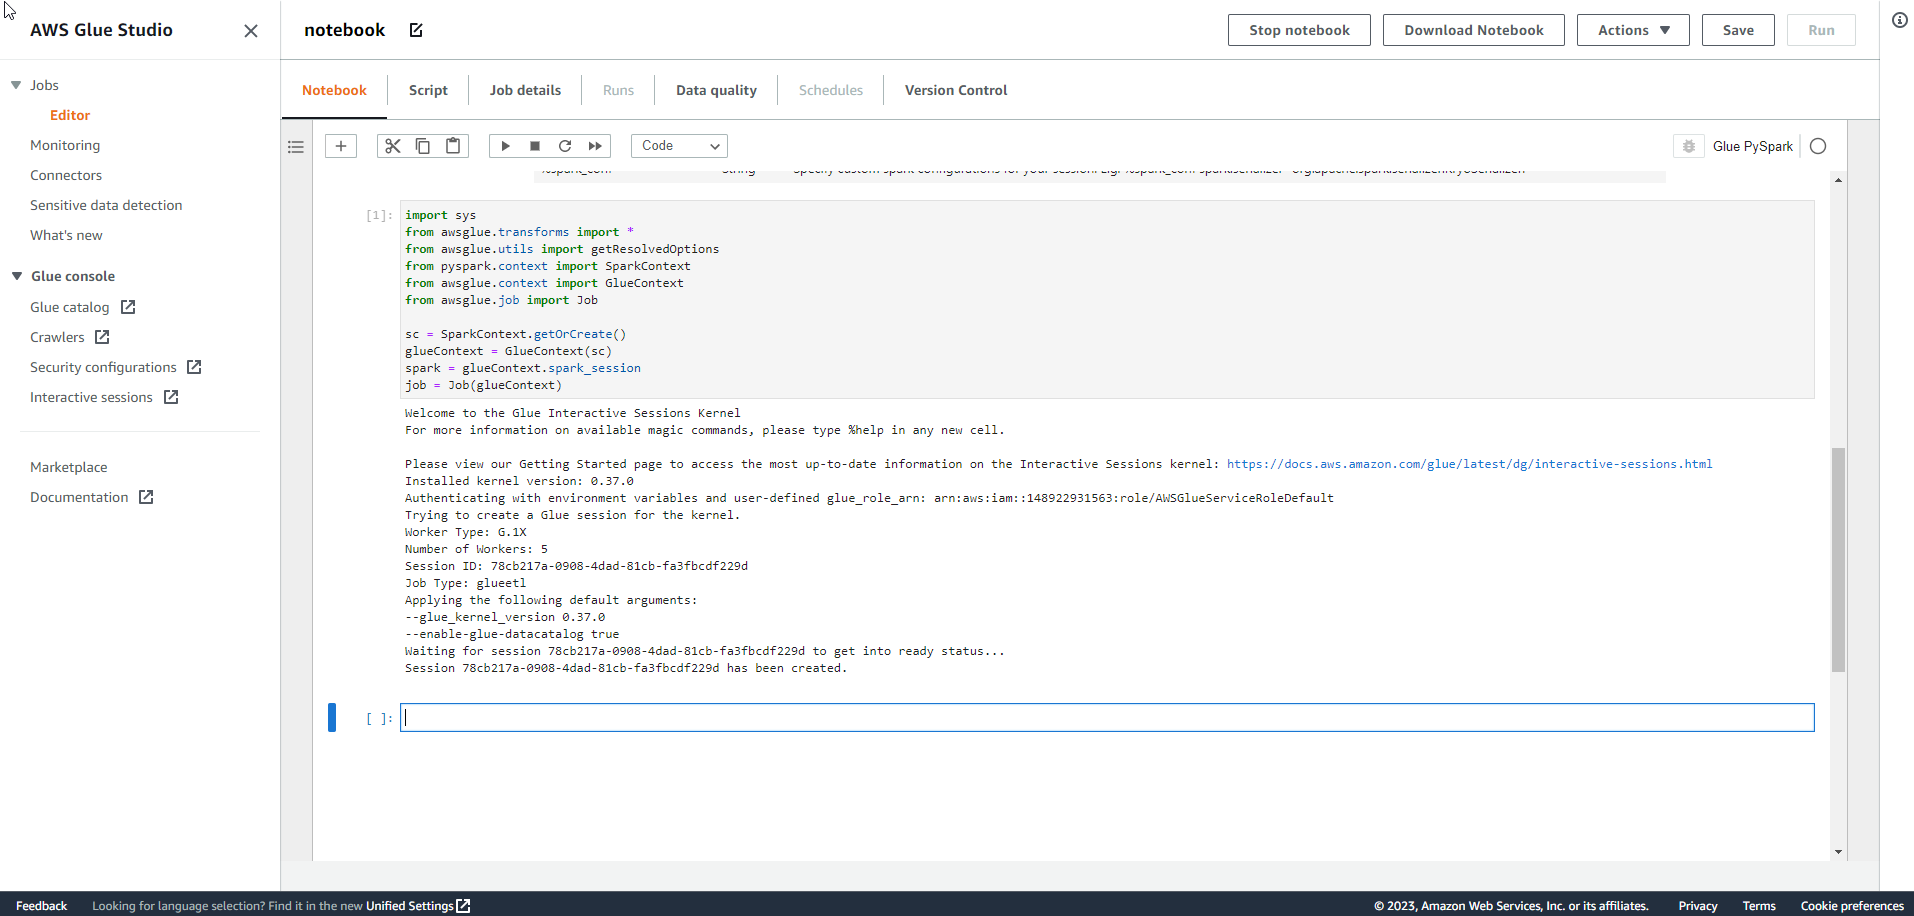
Bạn Run đoạn code đầu để khởi tạo Session
-
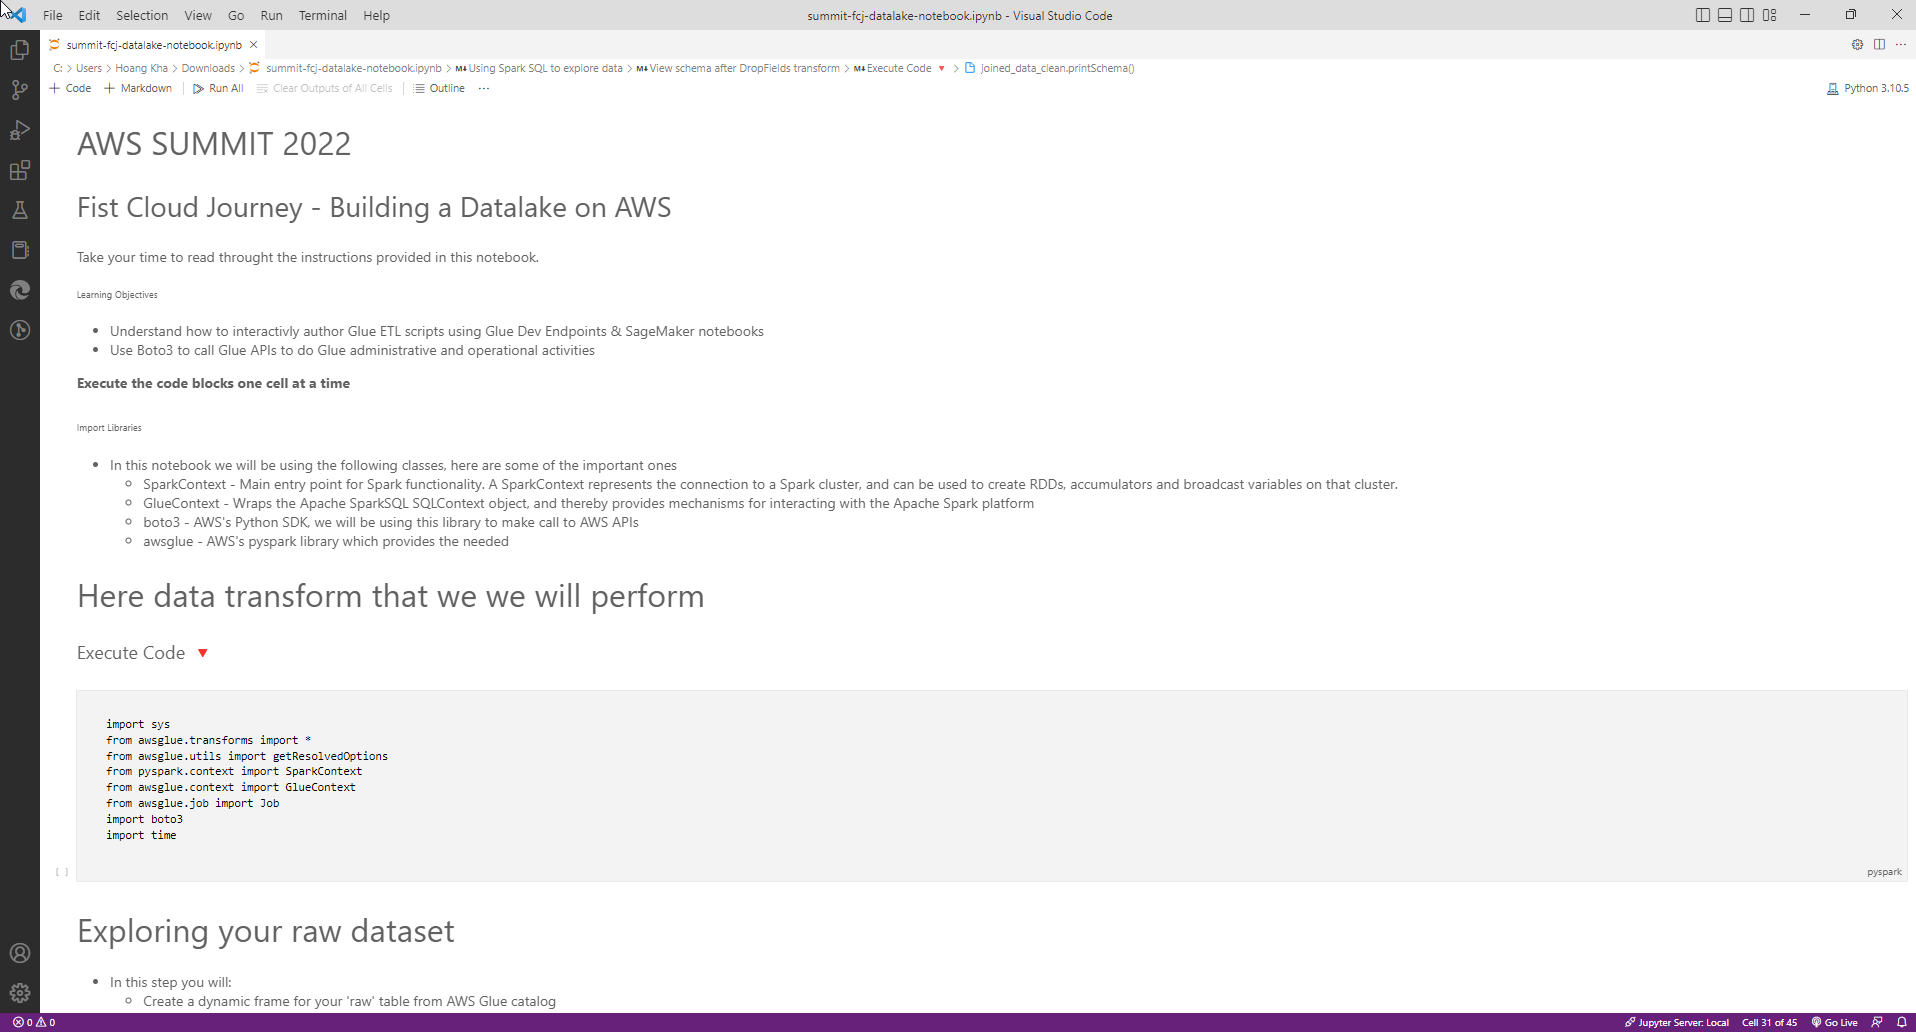
Trước tiên, chúng ta tải file notebook từ First Cloud Journey.
- Sử dụng phím tắt Ctrl + S để Save file notebook dưới dạng .ipynb
- Sau đó, sao chép và chạy từng dòng code từ file notebook.
-
Vậy là bạn đã hoàn thành khởi tạo 1 Interactive Session

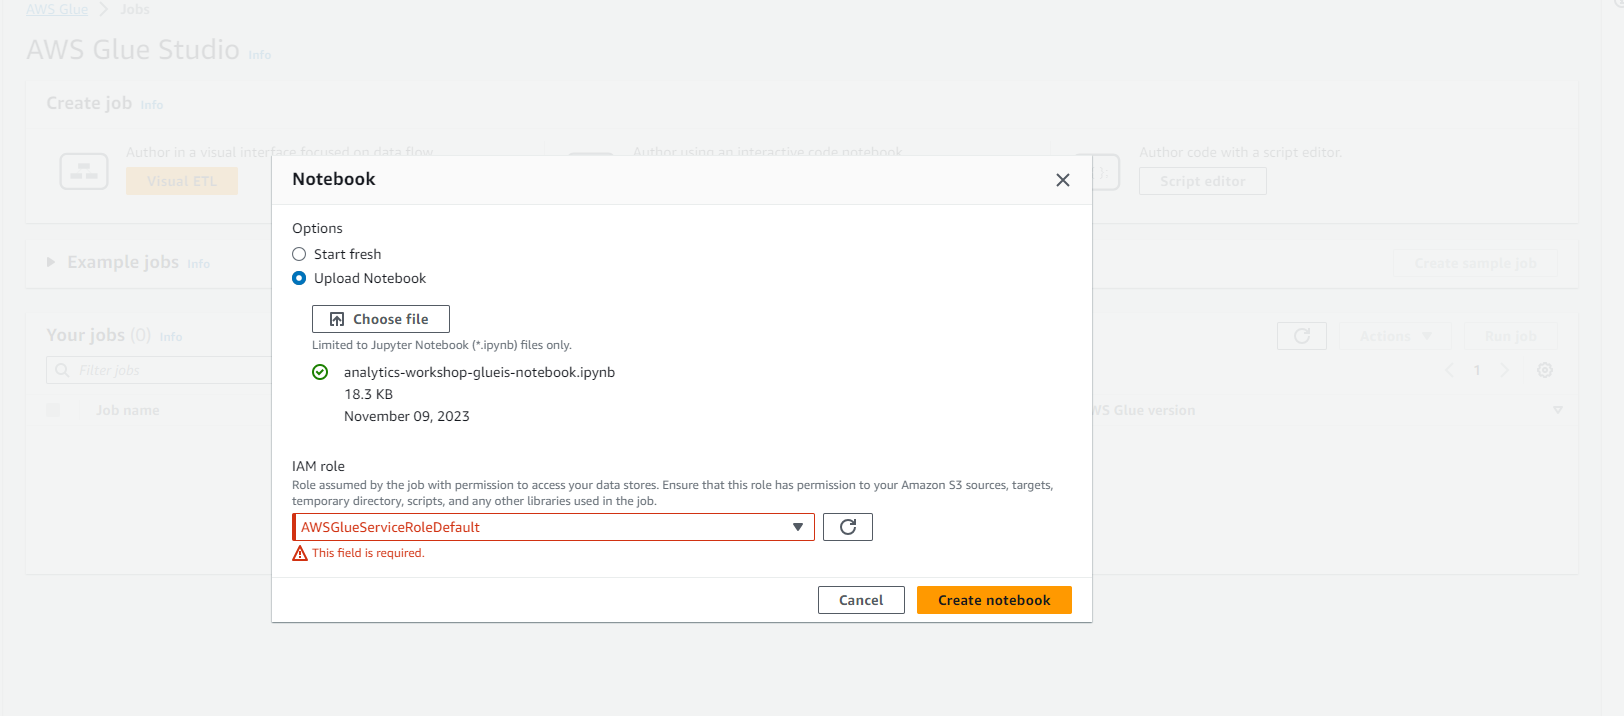
Cách 2 để tạo Notebook
-
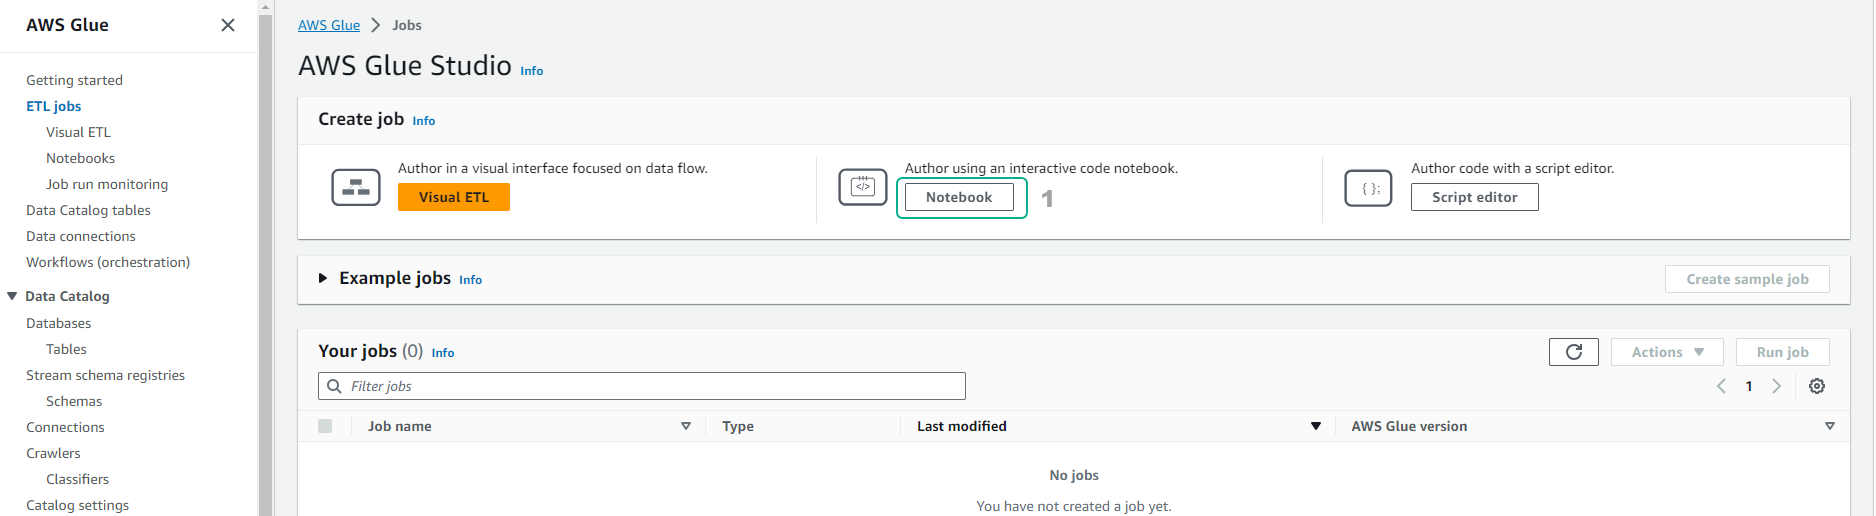
Truy cập vào AWS Glue Studio
- Chọn Jobs

-
Trong giao diện Jobs
- Chọn Jupyter notebook
- Chọn Upload and edit an existing notebook
- Bạn tải file từ First Cloud Journey
- Sau đó chọn file đã tải về và upload.
- Chọn Create
-
Hoàn thành tạo Notebook.
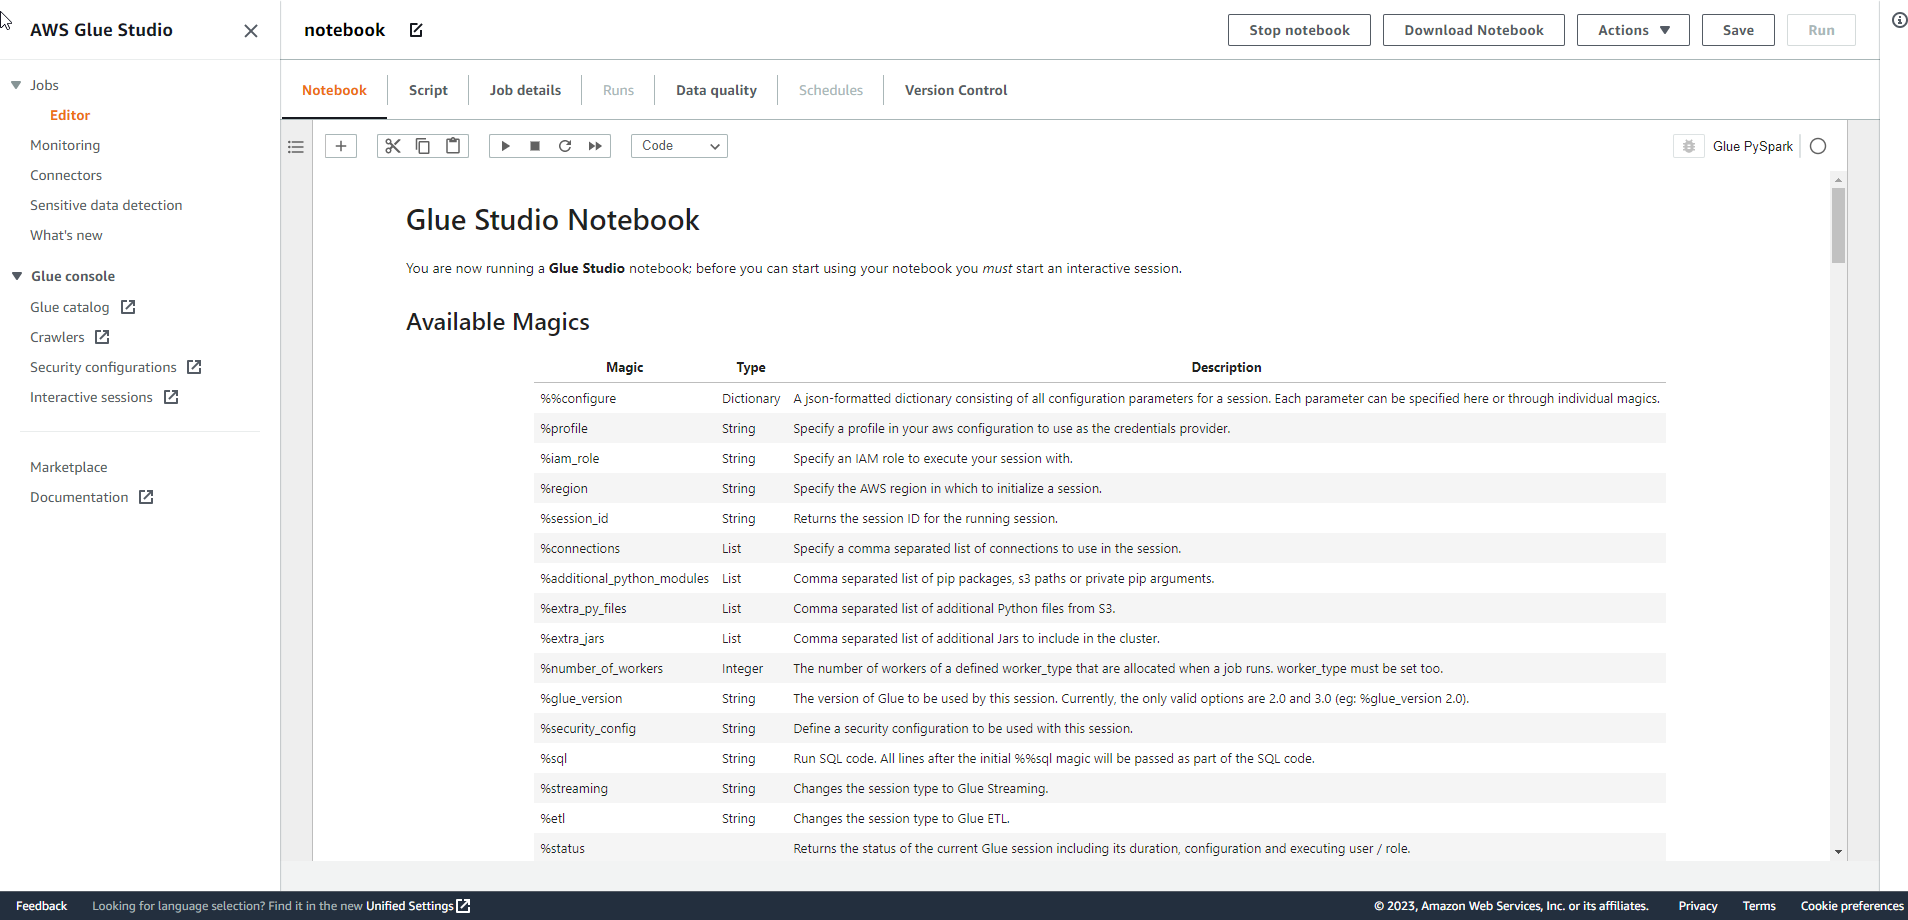
-
Hoàn thành khởi tạo session.

Chạy và giải thích code.
- Trong giao diện Notebook
-
Đầu tiên, chúng ta sẽ import libraries
- SparkContext
- GlueContext
- boto3
- awsglue
import sys
from awsglue.transforms import *
from awsglue.utils import getResolvedOptions
from pyspark.context import SparkContext
from awsglue.context import GlueContext
from awsglue.job import Job
import boto3
import time
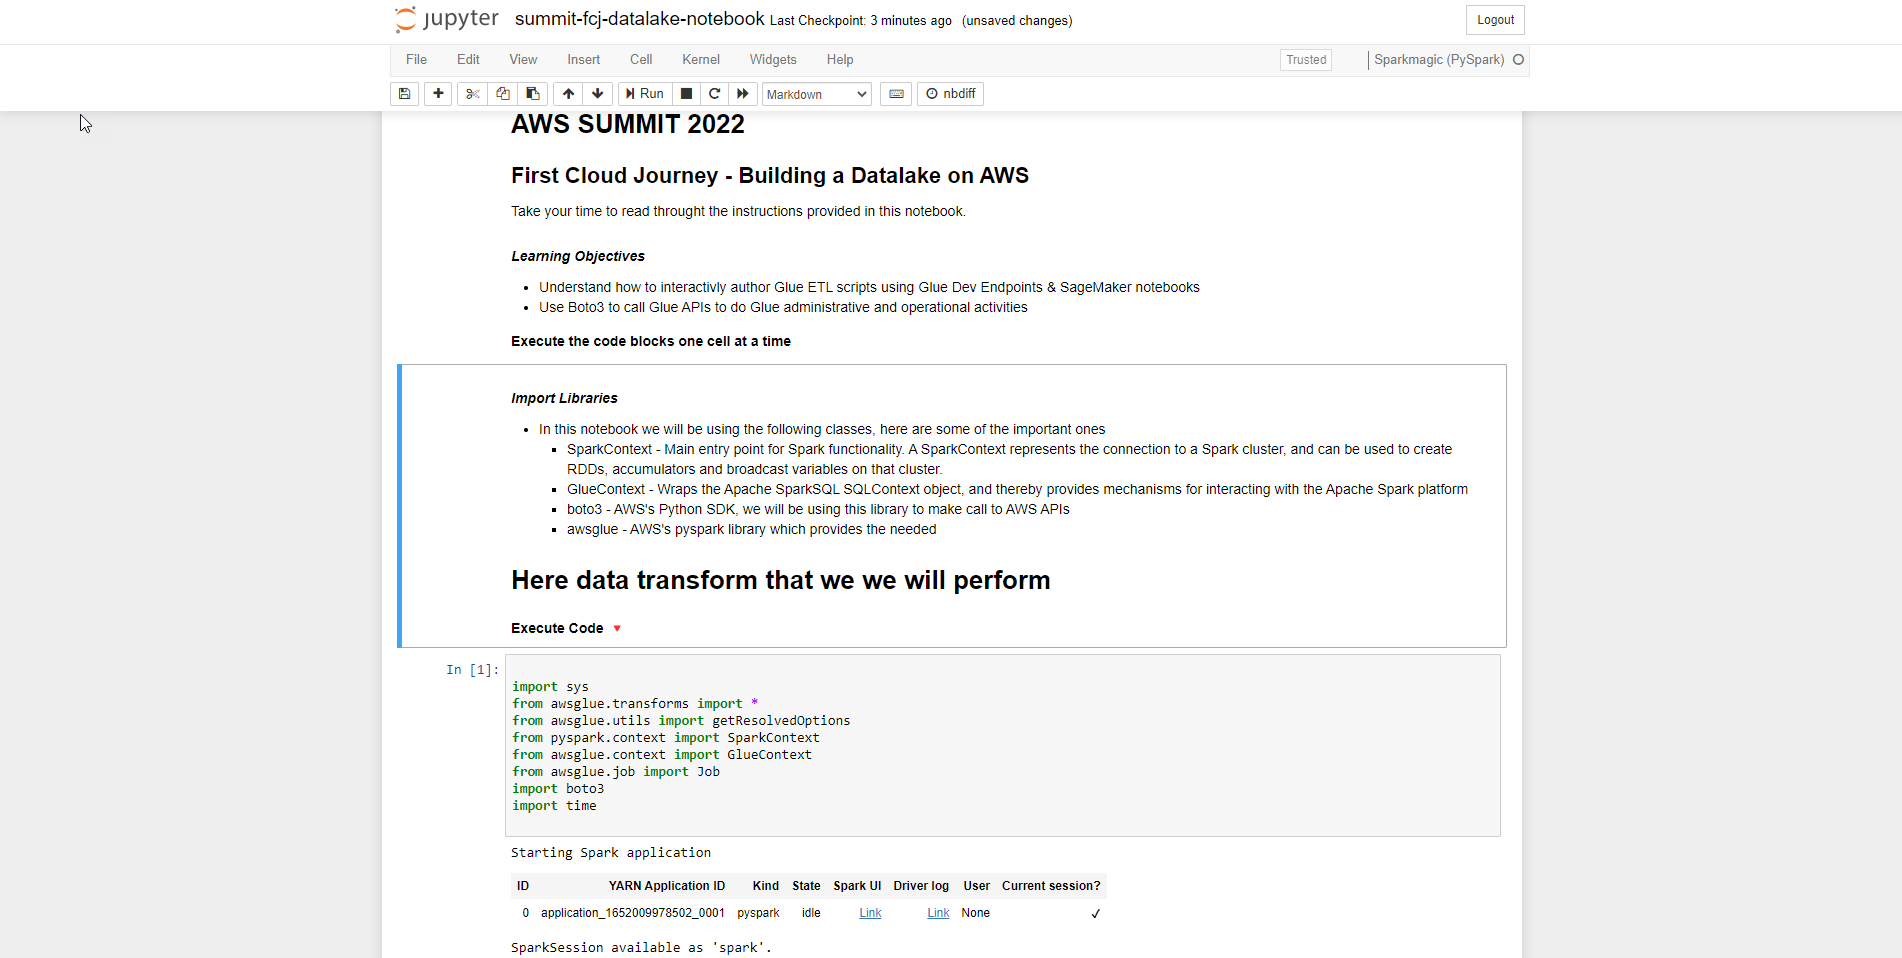
- Tiếp theo chúng ta bắt đầu khám phá dữ liệu
- Xem qua giới thiệu về Glue Dynamics Frames Basics
- Tài liệu tham khảo thêm
glueContext = GlueContext(SparkContext.getOrCreate())
spark = glueContext.spark_session
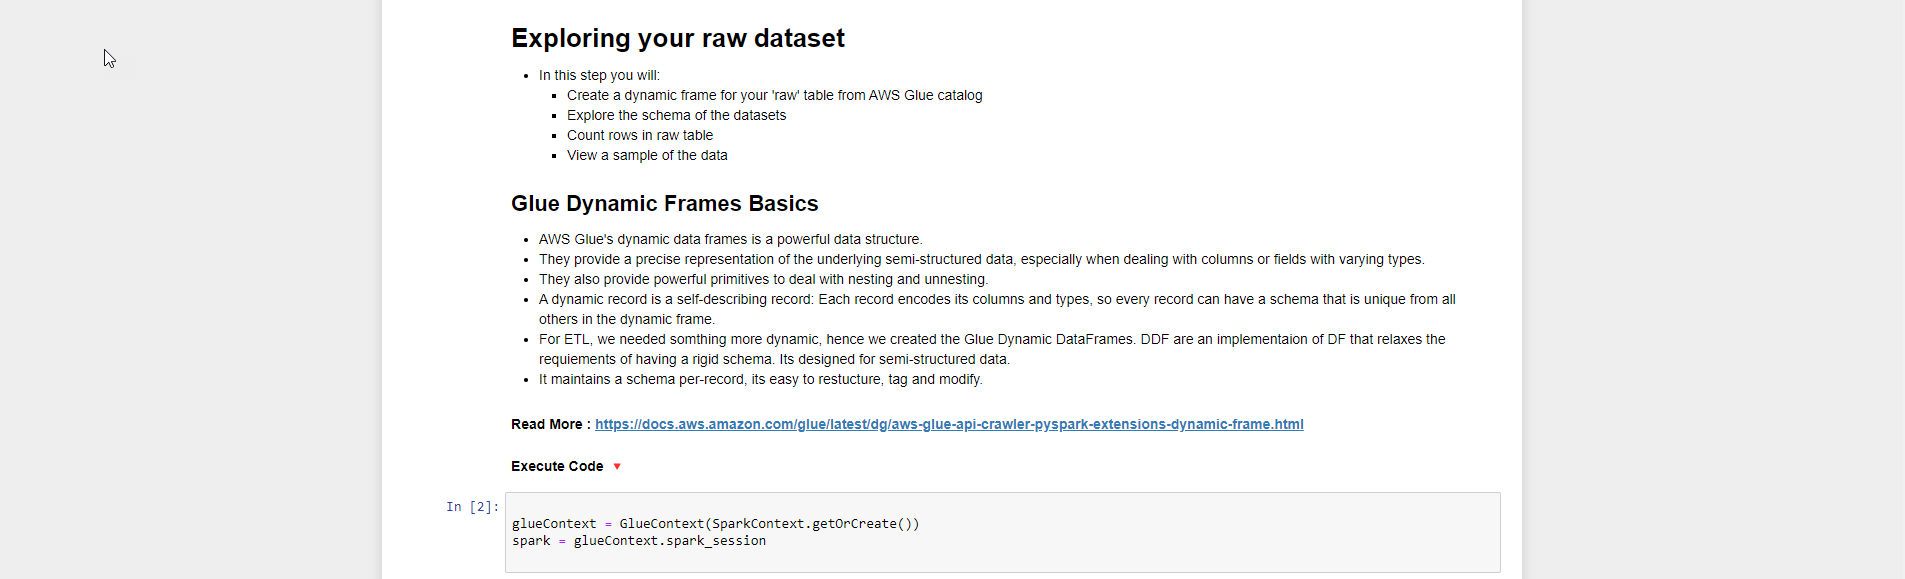
- Tạo dynamic frame cho bảng raw2022 (tên bảng có thể thay đổi do các bạn đặt nên lúc chạy code có thể tùy chỉnh) từ AWS Glue catalog
- Các bạn có thể tham khảo tài liệu từ Read More
raw_data = glueContext.create_dynamic_frame.from_catalog(database = "summitdb", table_name = "raw2022")

reference_data = glueContext.create_dynamic_frame.from_catalog(database = "summitdb", table_name = "reference_data")

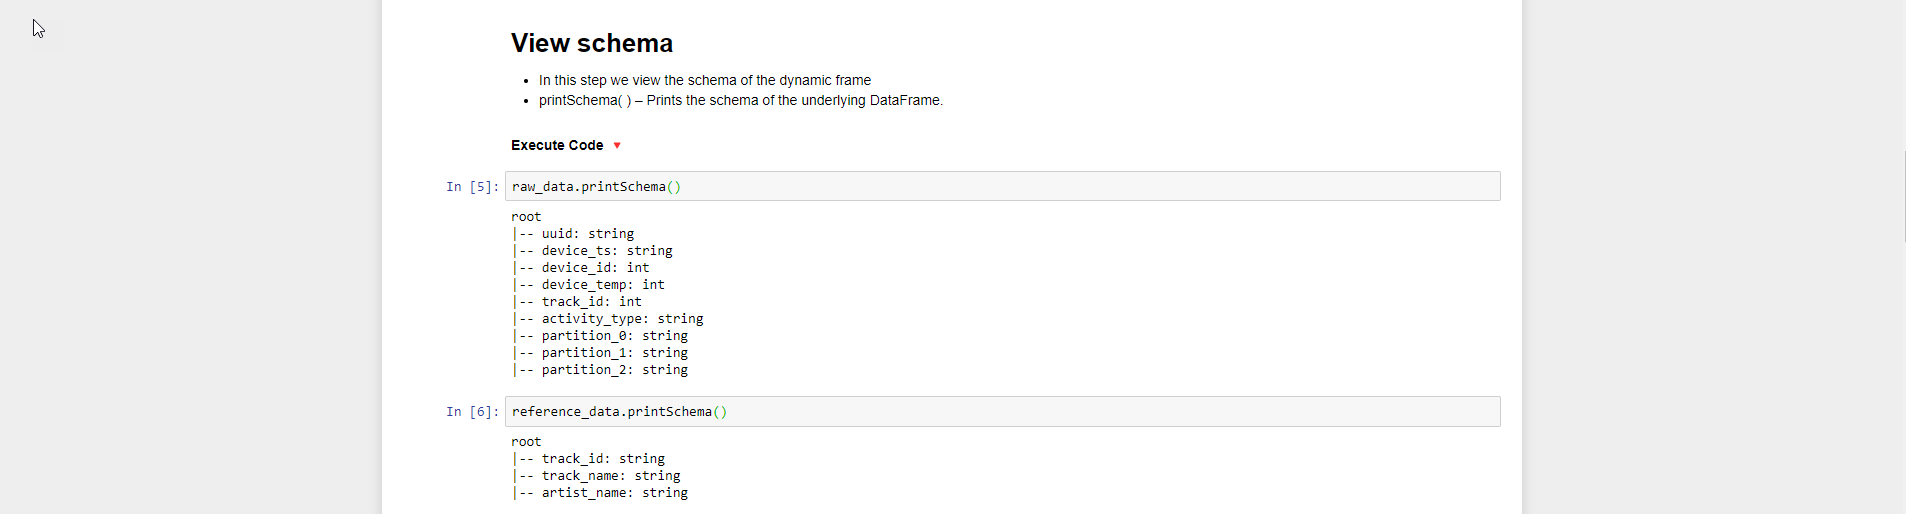
- Bước tiếp theo chúng ta xem lược đồ của dynamic frame
- Sử dụng lệnh printSchema
raw_data.printSchema()
reference_data.printSchema()
- Sau đó chúng ta thực hiện đếm số record trong dataframe bằng cách dùng hàm count()
print('raw_data (Count) = ' + str(raw_data.count()))
print('reference_data (Count) = ' + str(reference_data.count()))

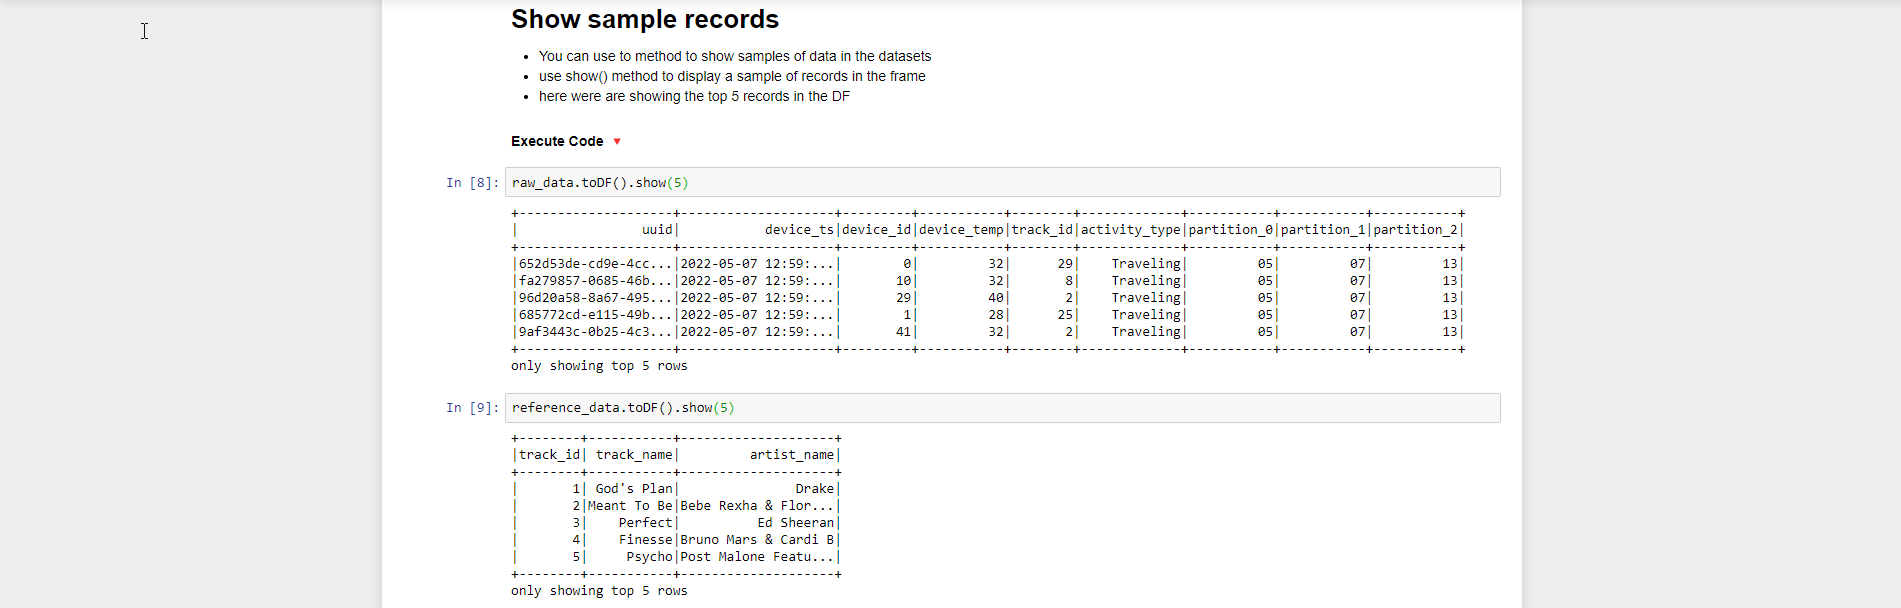
- Để show các sample record chúng ta sử dụng hàm show() và truyền vào số record cần show. Trong bài lab này chúng ta show 5 record từ Dataframe
raw_data.toDF().show(5)
reference_data.toDF().show(5)
- Phần tiếp theo, chúng ta sẽ sử dụng Spark SQL để khám phá dữ liệu
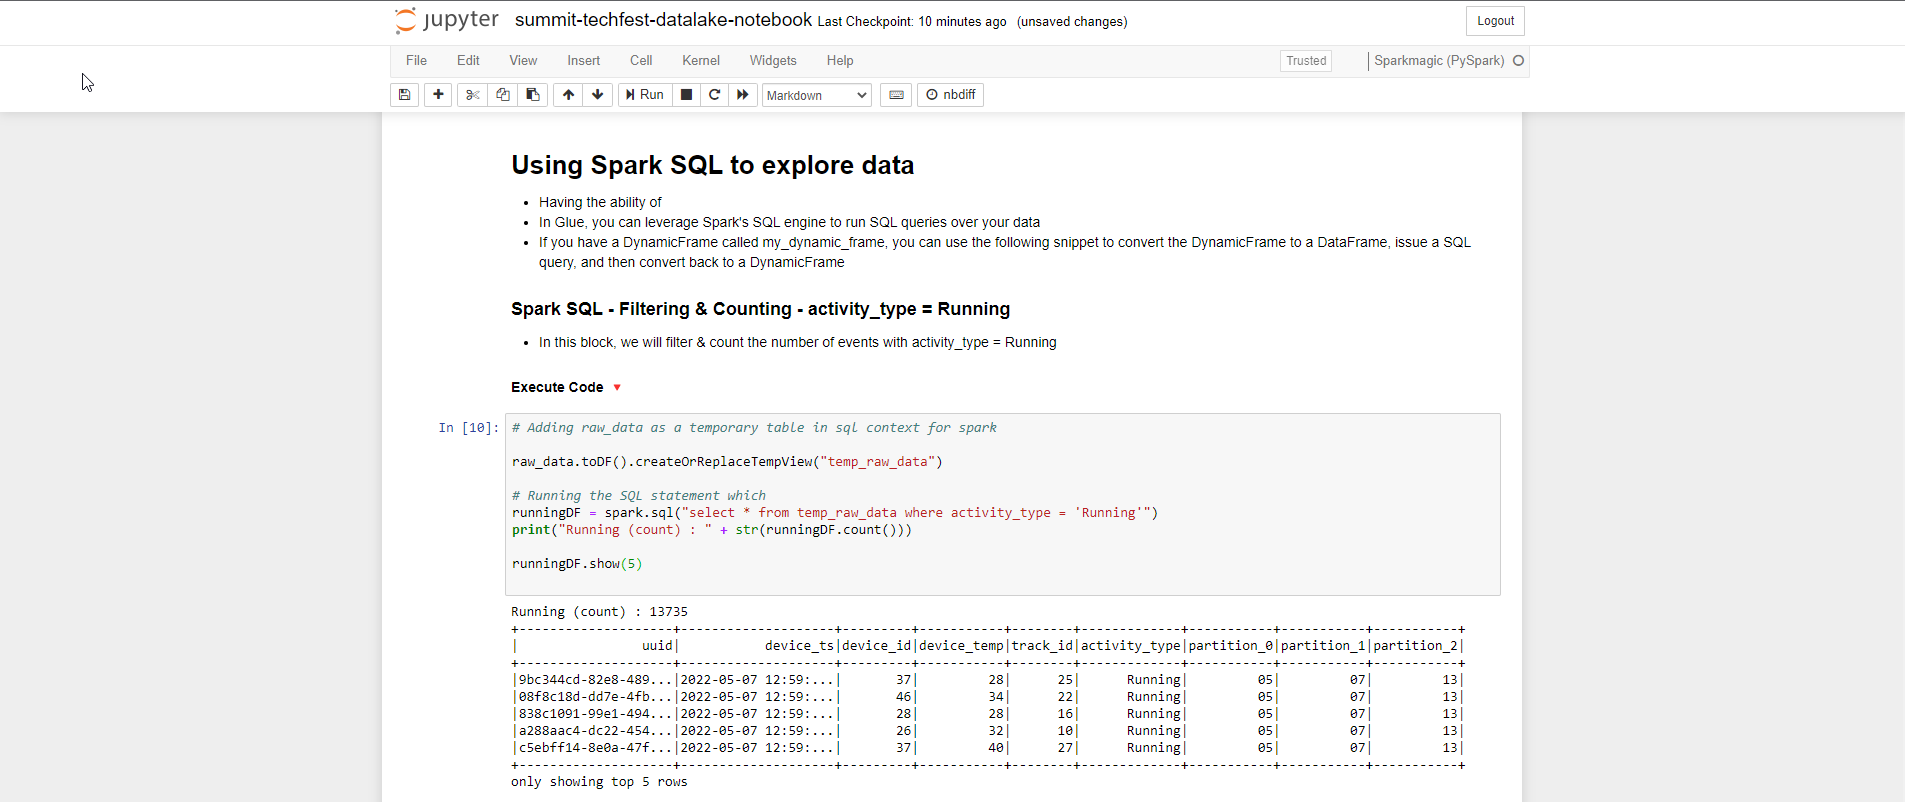
- Spark SQL - Filtering & Counting - activity_type = Running
# Adding raw_data as a temporary table in sql context for spark

raw_data.toDF().createOrReplaceTempView("temp_raw_data")

# Running the SQL statement which
runningDF = spark.sql("select * from temp_raw_data where activity_type = 'Running'")
print("Running (count) : " + str(runningDF.count()))

runningDF.show(5)
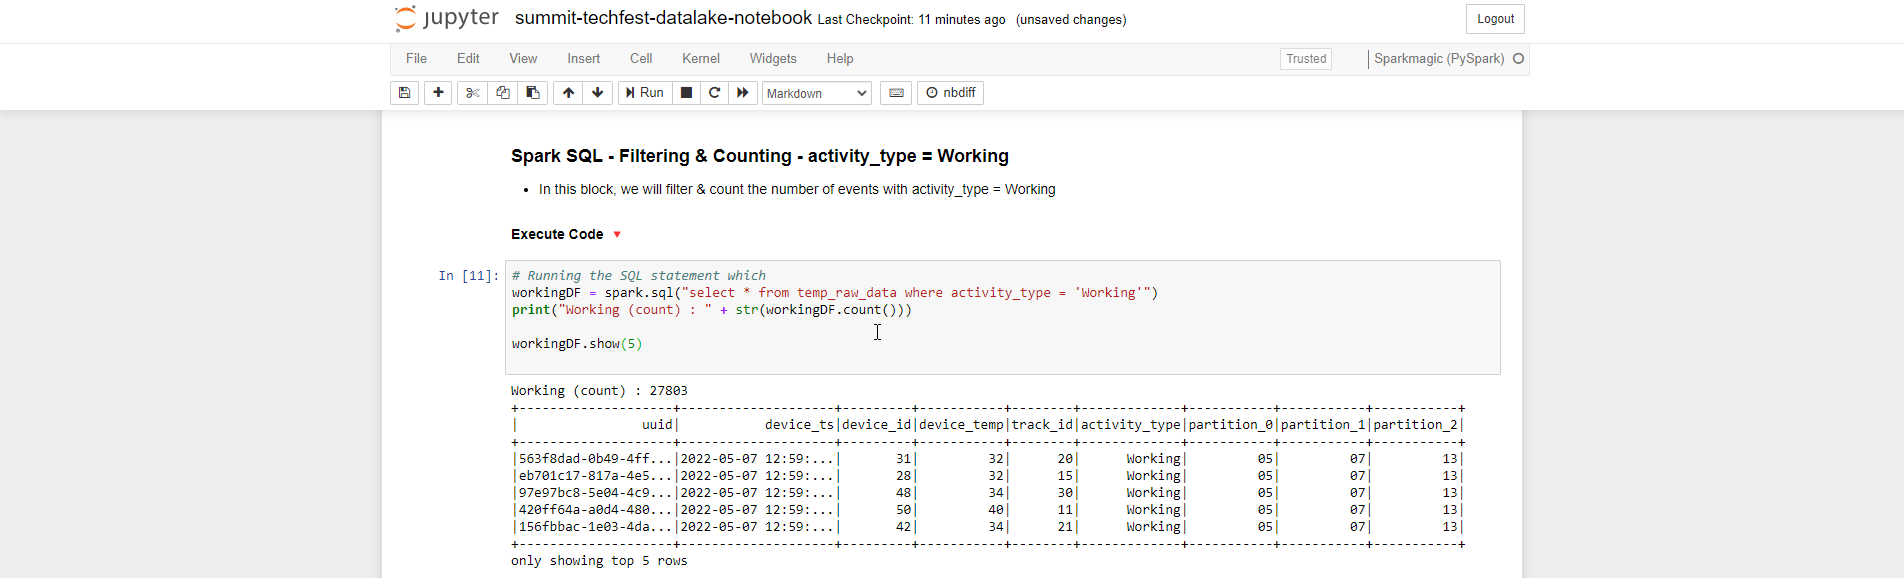
- Spark SQL - Filtering & Counting - activity_type = Working
# Running the SQL statement which
workingDF = spark.sql("select * from temp_raw_data where activity_type = 'Working'")
print("Working (count) : " + str(workingDF.count()))

workingDF.show(5)
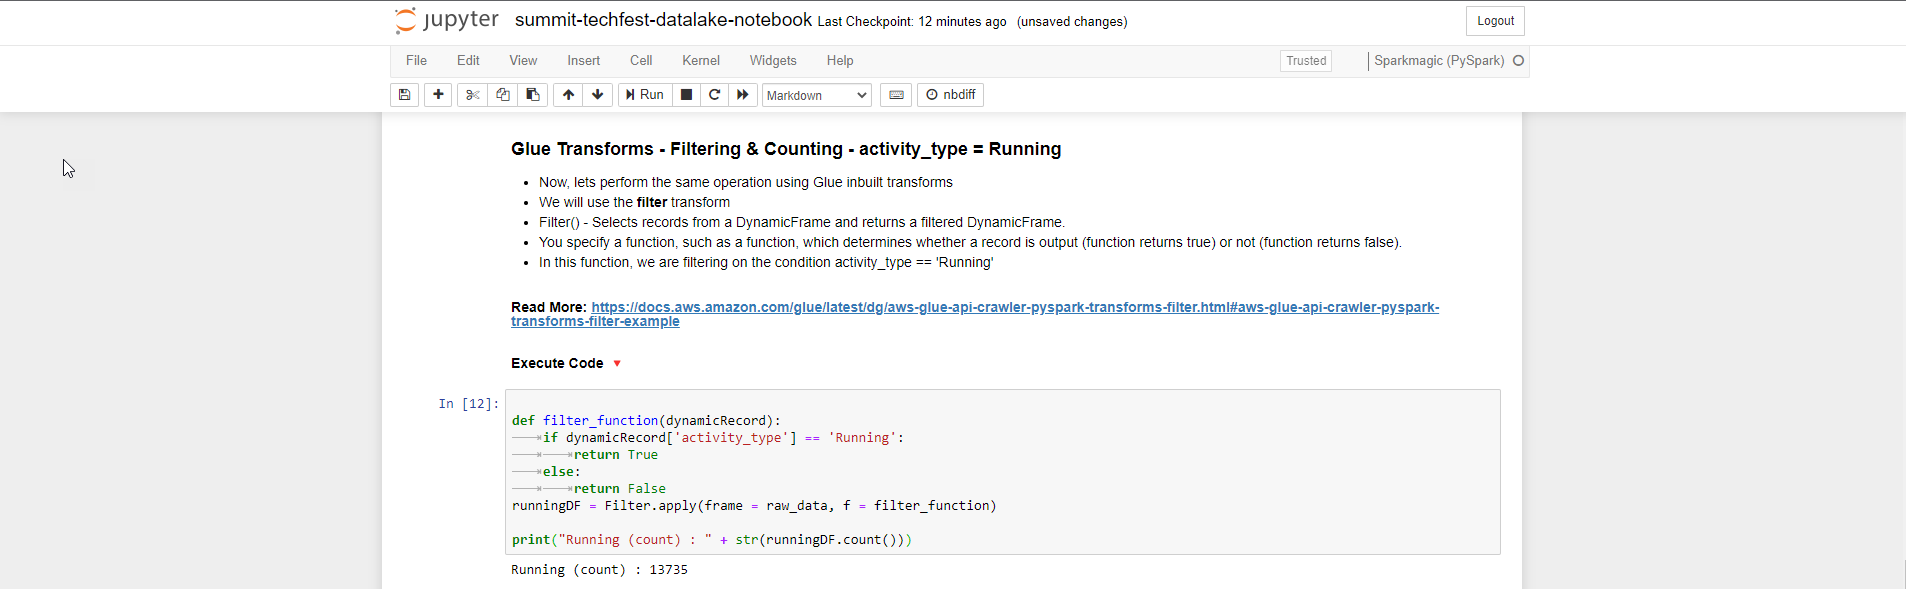
- Bước tiếp theo, chúng ta thực hiện transform sử dụng hàm Filter()
- Glue Transforms - Filtering & Counting - activity_type = Running
def filter_function(dynamicRecord):
	if dynamicRecord['activity_type'] == 'Running':
		return True
	else:
		return False
runningDF = Filter.apply(frame = raw_data, f = filter_function)

print("Running (count) : " + str(runningDF.count()))
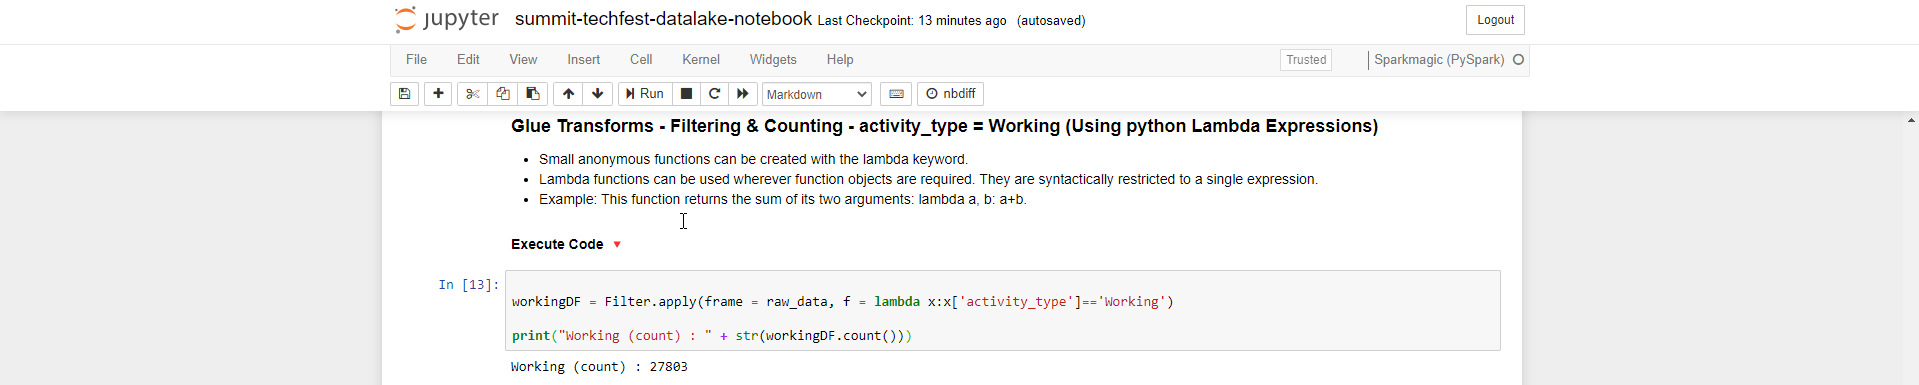
- Glue Transforms - Filtering & Counting - activity_type = Working bằng cách sử dụng python Lambda Expressions
workingDF = Filter.apply(frame = raw_data, f = lambda x:x['activity_type']=='Working')

print("Working (count) : " + str(workingDF.count()))
- Glue Transforms - Joining two dataframes, chúng ta thực hiện join dataframe vào column track_id bằng cách sử dụng hàm apply() và truyền vào frame1, frame2, key1, key2.
- Các bạn có thể tham khảo tài liệu Read More
joined_data = Join.apply(raw_data,reference_data, 'track_id', 'track_id')
- Sau khi join, chúng tao sẽ xem lại các schema đã join bằng hàm printSchema()
joined_data.printSchema()

- Chúng ta thực hiện làm sạch dữ liệu
joined_data_clean = DropFields.apply(frame = joined_data, paths = ['partition_0','partition_1','partition_2','partition_3'])

- Thực hiện xem schema sau khi DropFields transform, chuyển sang DataFrame và show dữ liệu (show 5 dòng đầu)

- Bước cuối cùng của transform là ghi dữ liệu vào S3 lưu trữ dưới dạng parqet. Bạn thay đường dẫn s3 bucket data thay cho s3://yourname-datalake-demo-bucket/data/processed-data/
try:
    datasink = glueContext.write_dynamic_frame.from_options(
        frame = joined_data_clean, connection_type = "s3",
        connection_options = {"path": "s3://yourname-datalake-demo-bucket/data/processed-data/"},
        format = "parquet")
    print('Transformed data written to S3')
except Exception as ex:
    print('Something went wrong')
    print(ex)

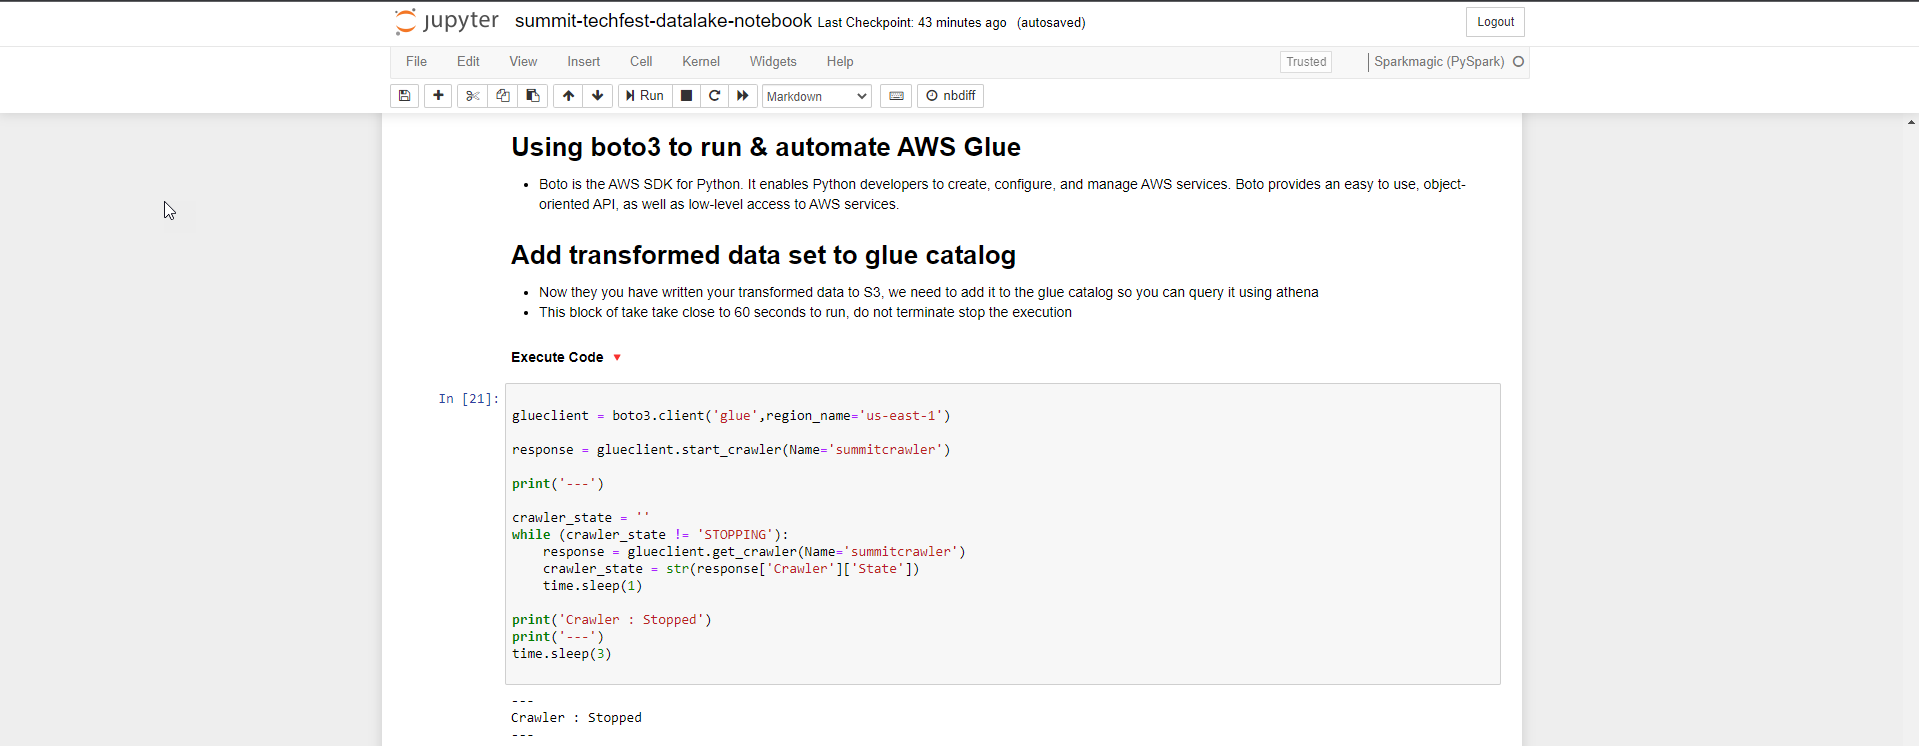
- Boto là AWS SDK dành cho Python. Chúng ta sử dụng boto3 để run and automate AWS Glue. Bạn thay đổi Region name tùy theo region bạn chọn.
glueclient = boto3.client('glue',region_name='us-east-1')

response = glueclient.start_crawler(Name='summitcrawler')

print('---')

crawler_state = ''
while (crawler_state != 'STOPPING'):
    response = glueclient.get_crawler(Name='summitcrawler')
    crawler_state = str(response['Crawler']['State'])
    time.sleep(1)

print('Crawler : Stopped')
print('---')
time.sleep(3)
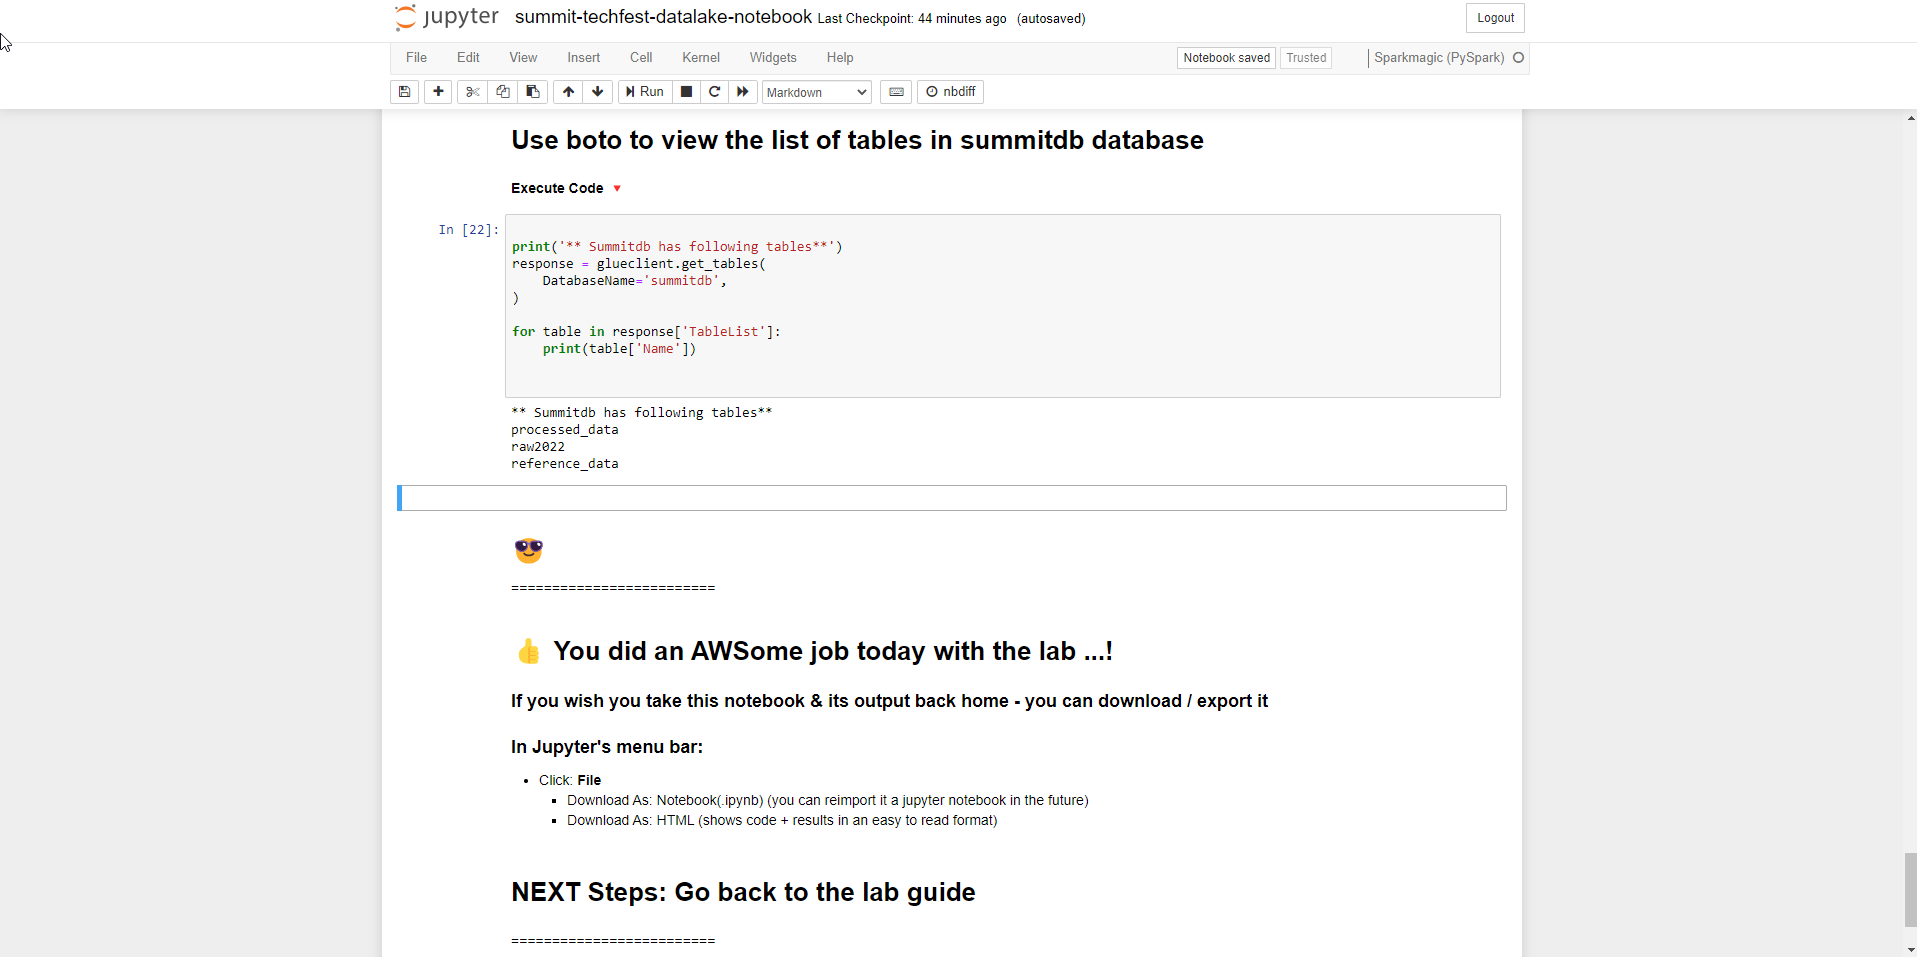
- Sau các bước thì chúng ta xem tổng quan danh sách các bảng trong summitdb database
print('** Summitdb has following tables**')
response = glueclient.get_tables(
    DatabaseName='summitdb',
)

for table in response['TableList']:
    print(table['Name'])
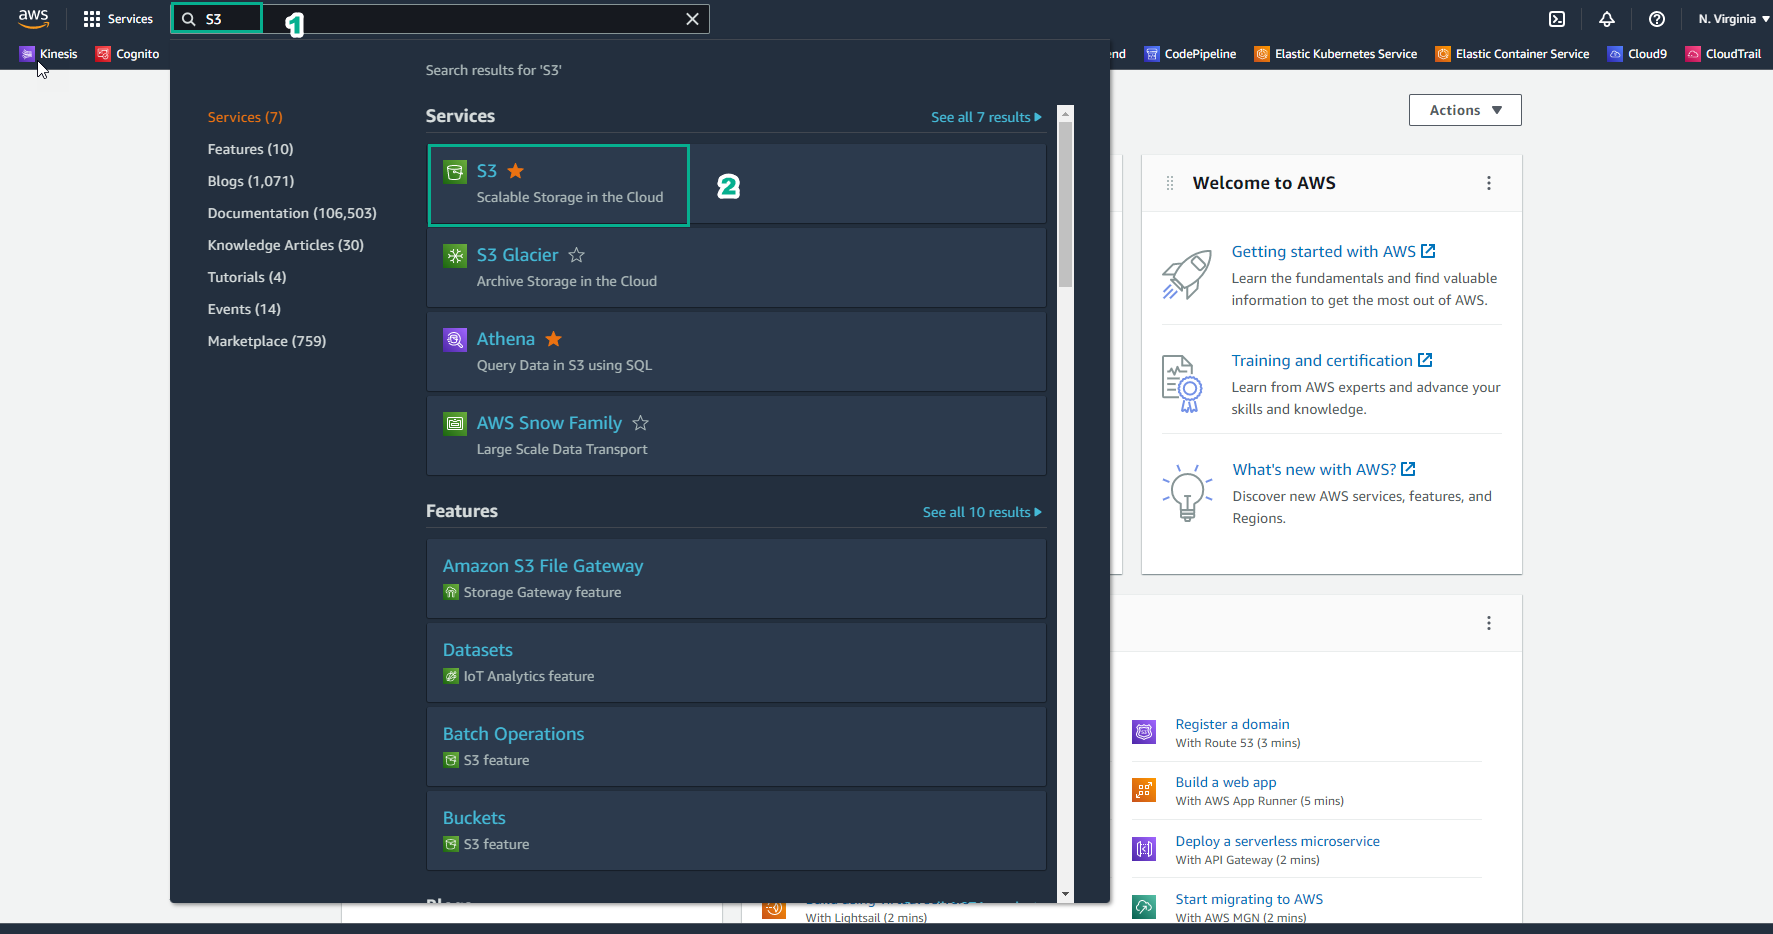
- Kiểm tra lại xem dữ liệu đã được ghi vào S3 chưa?
- Truy cập AWS Management Console
- Tìm S3
- Chọn S3
- Trong giao diện S3
- Chọn Buckets
- Chọn asg-datalake-demo-bucket
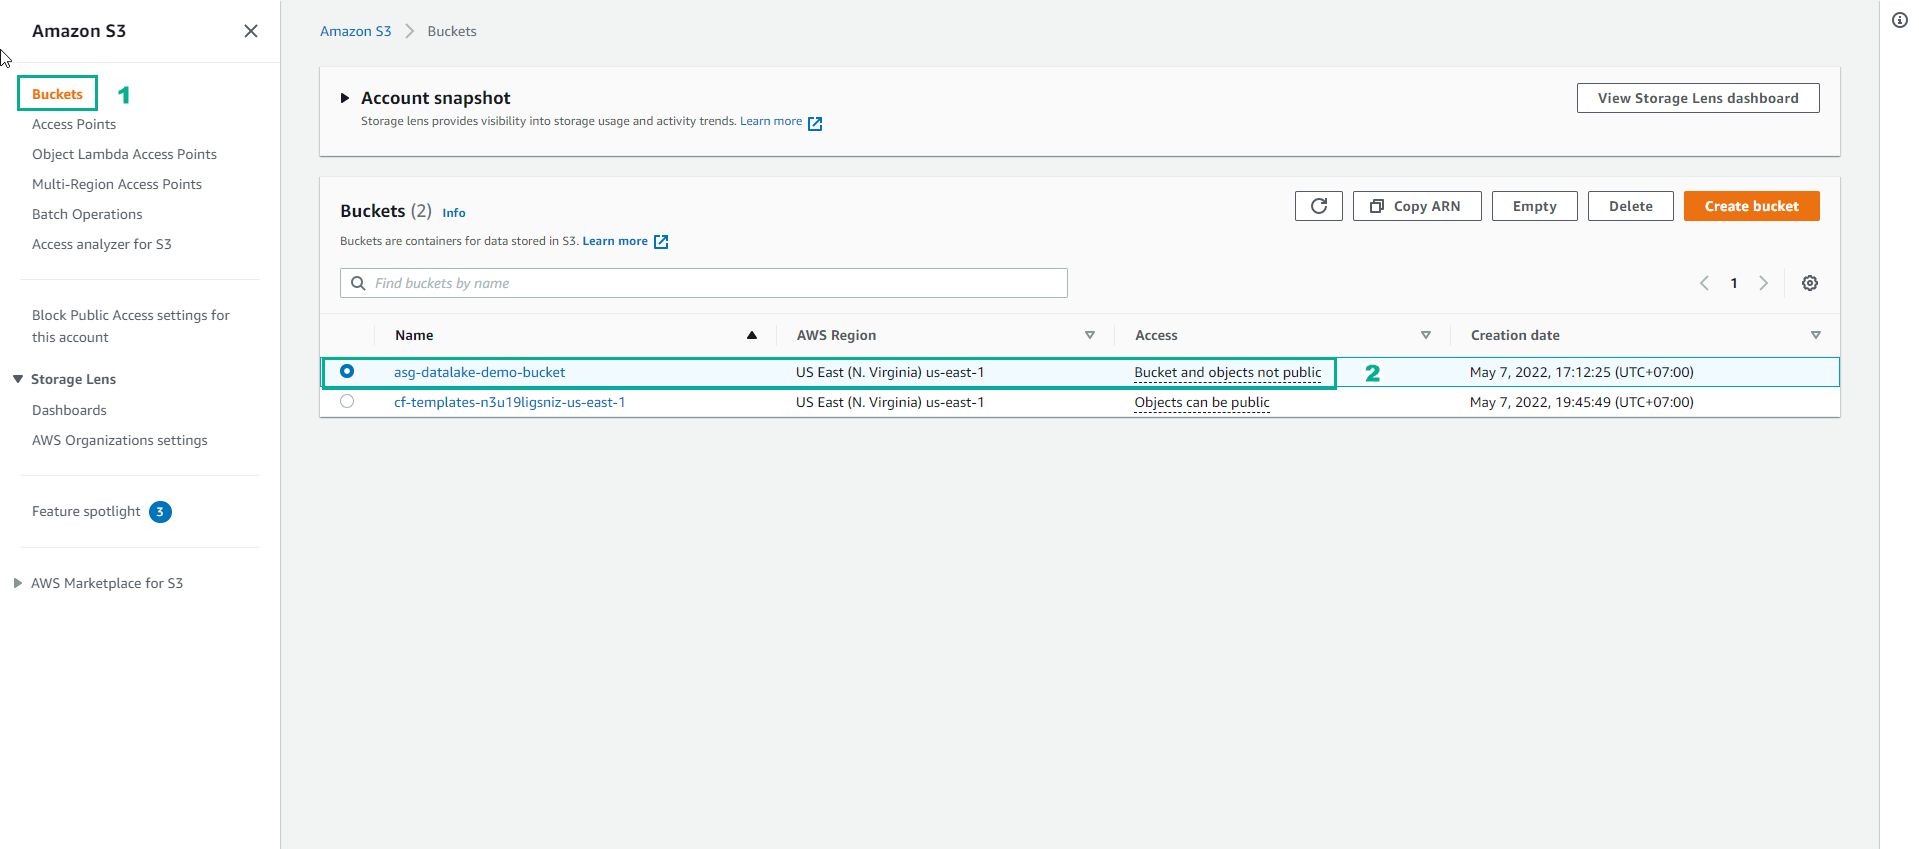
- Vào folder processed-data để xem dữ liệu transform được ghi
